
Infrastructure hardening: File syncing
Previously in this series: Hardening your personal infrastructure
The first thing you’re probably going to want is a way to auto-synchronize files between computers; once you have that, we can build a few things on top of it.
Lots of my friends use Dropbox, Google Drive, or Onedrive to sync files between their computers. This has a few advantages, but the big downside is that the amount of “cloud storage” you get is limited. I’m going to walk you through setting a program called SyncThing, which will sync as much data as you want between any computers you want, including phones.
Installation
- If you’re on a Windows PC, visit this page and click “SyncTrayzorSetup-x64.exe”.
- On Mac, visit this page and click the one that ends in .dmg.
- On Android, go here and click Install.
- On iOS, go here.
Go ahead and install Syncthing on two of the computers you want to share files between. For this tutorial, I’m going to assume you’re setting it up on a Mac and/or a PC first; we’ll do phones later.
On Mac or PC, once the program is installed, it will open a tab in your browser with the Syncthing interface. It will ask if you want to allow anonymous usage reporting; either choice is fine. It will also ask if you want to set up GUI authentication; you only need that if there’s someone else who uses your computer that you don’t want getting into your files.
Now you should be seeing a tab in your browser with the SyncThing interface. You can get back here later by clicking the Syncthing icon in your menu bar on Mac and clicking “Open”, or double-clicking the icon in your tray on PC. (The tray is the collection of icons next to your system clock in the lower-right corner of your screen; you may need to expand it by clicking the little arrow.) The Syncthing icon looks like this:
![]()
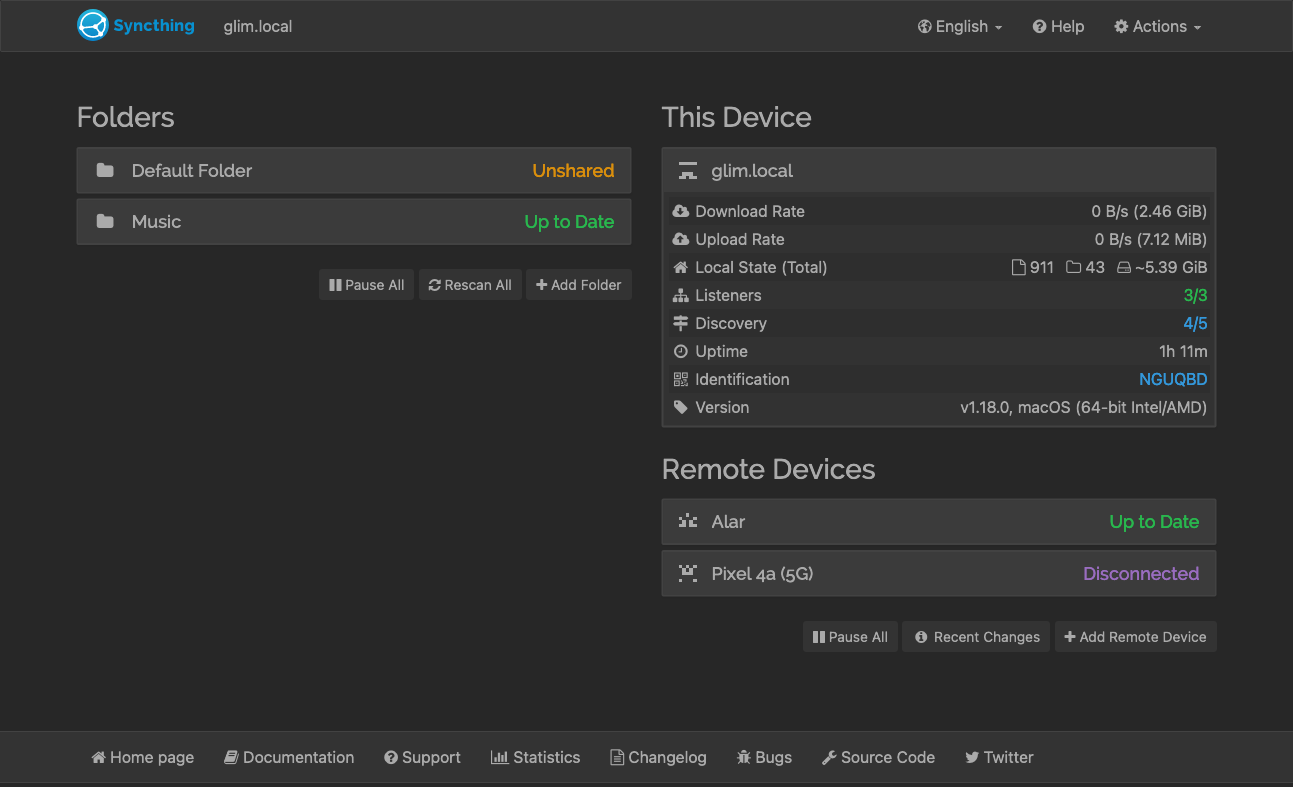
Here’s what the interface looks like:
Connecting devices together
See under “This Device” where it says “Identification”, with a series of letters next to it? Click the letters to see how this computer will identify itself to others. It will show you a QR code with a long string of letters above it; that’s the “Device ID”.
Open Syncthing on your second computer and click “Add Remote Device” (near the lower-right corner). Type in the Device ID the first computer is showing. (Instead of typing it in, it may show up in a list you can click.) Then go down to “Device Name” and give it a name that makes sense, like “Bob’s laptop”. Click “Save”. Shortly, your first computer should notice that the second one is trying to connect and ask whether that should be allowed; click the green “Add Device” button to confirm.
Now both of your computers should be listing each other under “Remote Devices”. It may take a few seconds for them to shake hands; when they do, you’ll see “Connected (Unused)” in green. Go ahead and do this for all the computers you want to connect together.
If you’re doing this on an Android phone, the process is a little easier. After you’ve installed Syncthing from the Play store, open the app and go to the Devices tab. Tap the + in the upper-right to add a new device. Tap “Name” and name the device you’re pairing the phone with. Then tap on the QR code icon next to “Device ID”. Give Syncthing permission to use your phone’s camera while the app is open. Then, on the computer you want to sync it with, show the Device ID like you did three paragraphs ago. Now instead of typing in the Device ID, you can just scan the QR code displayed on the screen. Tap the checkmark and you’re done.
Sharing folders
Under “Folders”, click “Add Folder”. If you’re on PC, click “Browse”; on Mac you’ll need to type in the folder’s path. (You can get that by control-clicking the folder in Finder; hold down the Option key to reveal the “Copy as Pathname” option and click it; then come back to Syncthing and press Command-V to paste it into the Folder Path field.)
Give the folder a label, then click the Sharing tab. Syncthing shows you a list of all the devices connected to this one; check the box next to each one you want to share this folder with.
Would you like Syncthing to make extra backup copies of files that get changed? If so, go to the File Versioning tab and change the setting from “No File Versioning” to “Staggered File Versioning”. (For more information, click the Help link.)
Finally, click Save. The receiving computer should notice it has an incoming folder and pop up a dialog; click “Add”, then do the last two paragraphs on the receiving computer so the settings are the same on both sides.
The folder should now appear in the Folders list, and its status should say “Syncing”. Congratulations! You set up a folder to auto-sync between two computers. Any change that you make on either computer will very shortly be reflected on the other. Folders can be synced between any number of computers, either over the internet or your home’s wireless network.
Things this is useful for
- Making your music library available across all your computers and your phone
- Sharing a library of movies with your family, whether or not you live in the same home
- Working on a project across multiple computers
- Keeping all of your passwords in an encrypted vault that lives on all your computers, and only those computers
- Backing files up from one computer to another (although you’d be better off with automatic versioned backups, as shown in my backups guide)
Here’s my favorite thing that I sync across my computers: Obsidian lets me treat a folder full of text files as a personal wiki. This is where I keep all of the little notes I need to run my day-to-day life (including my notes for future blog posts). It’s like OneNote, but much more capable–it has all sorts of plugins available, you can attach any kind of file into it, and since all of the information is in plaintext or Markdown it will still be readable in a hundred years, long after OneNote no longer exists. 💛 Obsidian.
Anyway, I hope this tutorial helps someone. I hesitate to offer the internet unlimited tech support for Syncthing, but if you get stuck following this tutorial, leave a comment and I’ll help if I can.